
Where to Place Acoustic Panels: Best Positions for Every Room

Acoustic wall panels have become an increasingly popular addition to modern homes. Not only do they add warmth and texture to interior spaces, but they can also help reduce unwanted echoes and improve the way sound travels around a room.

However, simply installing panels on an empty wall doesn’t always deliver the best results. Where you position them can make a significant difference to their effectiveness.

Whether you’re updating a living room, creating a home office or improving the acoustics in a bedroom, understanding where to place acoustic panels will help you get more from your investment.

In this guide, we’ll explore the best locations for acoustic panels, how placement varies between rooms and the common mistakes worth avoiding.
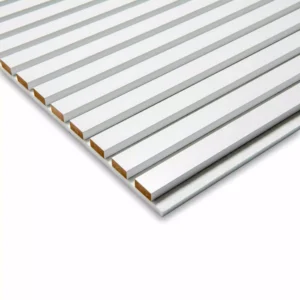
diy acoustic panels

How Do Acoustic Panels Work?

Before deciding where to install acoustic panels, it’s useful to understand what they actually do.

Sound waves travel through a room and bounce off hard surfaces such as walls, windows, ceilings and floors. When these reflections overlap, they can create echoes and reverberation, making conversations and other sounds less clear.

Acoustic panels are designed to absorb some of this reflected sound energy.

Depending on their construction, panels may contain materials such as acoustic felt, mineral wool or other sound-absorbing fibres. These materials help reduce reflections, particularly in the middle and higher frequency ranges.

It’s important to distinguish acoustic treatment from soundproofing.

Acoustic panels primarily improve sound quality within a room. They generally won’t prevent loud neighbours, traffic or other external noises from travelling through walls.

For homeowners looking to reduce echo while introducing a decorative feature, slatted acoustic wall panels can offer a practical combination of appearance and functionality.

Where Are the Best Places to Install Acoustic Panels?

The ideal position depends on your room’s shape, furniture arrangement and main sources of sound.

However, several locations are particularly worth considering.

1. First Reflection Points

First reflection points are the areas where sound initially bounces off a surface before reaching your ears.

For example, when watching television, sound travels directly towards you but also reflects off nearby walls and ceilings.

These reflections can affect the clarity of speech and other audio.

Installing acoustic panels on side walls between the television and seating area may help reduce these unwanted reflections.

One simple way to identify a reflection point is the mirror method.

Sit in your normal listening position and ask someone to move a mirror along the side wall. Wherever you can see a speaker reflected in the mirror is a potential first reflection point.

This technique is particularly useful for home cinemas, music rooms and spaces with dedicated speaker systems.

2. Large Empty Walls

Large, uncovered walls often contribute to noticeable echoes, especially in modern homes with minimalist interiors.

Rooms containing plastered walls, wooden flooring and limited soft furnishings tend to reflect more sound than heavily furnished spaces.

Covering part of a large wall with acoustic panels can help reduce reflections while creating an attractive focal point.

A popular option is to install vertical wood-slat panels behind a sofa, television unit or dining area.

For homeowners interested in decorative options, Irish supplier quietwalls.ie offers acoustic wall panels that can be incorporated into contemporary interior designs.

3. Walls Opposite Sound Sources

Another useful position is the wall directly opposite a significant sound source.

For example, a television positioned against one wall sends sound across the room. Some of that sound reflects off the opposite wall and travels back towards the seating area.

Adding acoustic treatment to this surface can help reduce returning reflections.

This can be particularly beneficial in rectangular rooms where sound repeatedly bounces between two parallel walls.

4. Ceilings

Ceilings are sometimes overlooked when planning acoustic improvements.

However, sound also reflects between the floor and ceiling, particularly in rooms with hard flooring or unusually high ceilings.

Specialist acoustic ceiling panels can reduce these reflections.

They are commonly used in open-plan living areas, offices and dining spaces where wall treatments alone may not provide enough absorption.

Ceiling installations require suitable products and secure fixings, so it’s important to check that any panels are approved for overhead use.

5. Room Corners

Corners can contribute to uneven sound, particularly at lower frequencies.

In rooms used for music production or home cinema systems, low-frequency energy may accumulate around room boundaries.

Specialist bass traps are generally more suitable for dealing with these problems than thin decorative wall panels.

For everyday residential spaces, however, treating large reflective walls is often a more useful starting point than concentrating on corners.

Where to Place Acoustic Panels in Different Rooms

Each room presents different acoustic challenges, so placement should reflect how the space is used.

Living Rooms

Living rooms are among the most popular spaces for acoustic wall panels.

Televisions, music systems, conversations and hard flooring can all contribute to sound reflections.

Some effective locations include:

  • Behind the television or entertainment unit
  • On walls beside the main seating area
  • Behind the sofa, particularly when it faces a large uncovered wall
  • On large feature walls in open-plan spaces

Installing decorative slatted panels behind a television can create an attractive backdrop while potentially improving the room’s acoustic comfort.

However, the most effective location will depend on the actual sound reflections rather than appearance alone.

Bedrooms

Bedrooms typically contain more soft furnishings than other rooms.

Beds, carpets, curtains and upholstered furniture naturally absorb some sound, meaning extensive acoustic treatment may not be necessary.

Nevertheless, rooms with wooden floors or minimal furnishings can still experience unwanted reverberation.

The wall behind the headboard is a popular location for decorative acoustic panels.

Floor-to-ceiling wood-slat panels can introduce warmth and texture, creating a comfortable feature wall.

When improving acoustics is the main priority, it’s also worth considering exposed walls opposite the bed.

Home Offices

With remote and hybrid working now common, home offices have become another popular location for acoustic panels.

A room with bare walls and laminate flooring can create a noticeable echo during video calls.

This is particularly problematic when using microphones, as excessive reverberation can make speech sound distant or unclear.

Useful positions include the wall behind the desk, nearby side walls and surfaces facing the main speaking position.

If you regularly participate in online meetings, test the room by recording a short voice clip before and after installing panels.

This gives you a simple way to assess whether the treatment has improved clarity.

Dining Rooms and Open-Plan Kitchens

Modern kitchens and dining areas often combine several highly reflective materials.

Tiles, glass, painted walls and hard worktops can create lively acoustic environments, particularly when several people are talking.

In an open-plan room, sound can travel between cooking, dining and living areas without encountering many absorbent surfaces.

Installing acoustic panels on available walls near dining areas may help control some of this reverberation.

Decorative wood-effect panels can also help visually define different zones within a large open-plan space.

Where space allows, combining wall panels with rugs, curtains and upholstered dining chairs may provide additional benefits.


Starting a container garden in a small outdoor space

Containers offer a flexible way to add planting where there is little open ground. I like the idea of starting with a small group that is easy to care for, rather than filling every available corner on the first shopping trip. The plants need to suit the space, and the space needs to remain usable.

Read the conditions first

Look at the amount of direct sun, the wind exposure and whether the area sits in a sheltered corner. A plant suited to a sunny, protected patio may struggle on an exposed balcony. Use the plant label or ask a nursery for guidance specific to those conditions.

On a balcony, check the building’s rules and load limits before adding heavy containers. Pots, wet growing medium and retained water can be considerably heavier than they look.

Choose pots for the plant and the location

The container needs appropriate drainage and enough room for the plant’s roots. Very small pots can dry out quickly, which may create more work than you want. Check whether the material is suitable for exposure to frost where you live.

Use a growing medium suitable for the selected plant and container. There is no single compost mix that is ideal for everything.

Keep the arrangement simple

A limited range of pot colours can help different plants feel connected. I would vary height more than finish, using a taller plant to give structure and smaller ones around it where their growing needs are compatible.

Leave space to reach each pot for watering and maintenance. A dense arrangement may look attractive initially but become awkward once the plants grow.

Make care part of the plan

Think about the route from the tap and what happens when you are away. Check the moisture in the growing medium rather than watering solely by a rigid timetable; weather, pot size and plant type all affect the need.

Remove damaged growth and review the arrangement as the season changes. If a plant repeatedly struggles, reconsider the conditions rather than buying the same replacement. My starting point would be a handful of suitable containers and room to learn what works. For seating alongside them, read these small patio ideas.


Wild Design is an independently owned personal interiors blog. This website is not affiliated with, endorsed by, or connected to any previous owner, business or organisation that used this domain. Content published here belongs to the current website and does not represent any previous owner.

A small patio can feel like somewhere to stay

A small patio does not need to accommodate every kind of outdoor activity. I would choose one main use and make that work comfortably. A quiet place for a morning coffee asks for a different layout from somewhere to eat with several people.

Check the usable area

Measure the space and mark door swings, drains and the route to the rest of the garden. Furniture needs to fit while being used, not just while pushed neatly into place. A chair pulled back from a table can take up more space than expected.

Also watch where the sun and shade fall at the time you expect to sit outside. The most convenient corner is not always the most comfortable one.

Choose seating for your main activity

If you mainly want to read, one comfortable chair and a side table may be more useful than a compact dining set. If meals are the priority, check the table height and how much room there is around each seat.

Folding furniture can help where the patio needs to serve more than one purpose, but it still needs dry, accessible storage when folded away.

Let planting frame the seating

A few well-placed containers can create a sense of enclosure without filling the centre of the patio. Choose plants suited to the light, exposure and container size. Allow for growth rather than judging only how a new plant looks in its nursery pot.

I would keep access to drains and doors clear, and use saucers or stands thoughtfully so they do not cause problems for the surface beneath them.

Plan for weather and upkeep

Check the furniture maker’s care instructions and whether cushions need to be brought inside. A surface described as suitable for outdoors may still need regular cleaning or protection. Think about where damp cushions would go before buying a full set.

Any lighting used outside should be rated for the intended location and installed appropriately. The patio should still be easy to walk through when the chairs are out. For an even smaller outdoor starting point, see my container garden planning notes.


Wild Design is an independently owned personal interiors blog. This website is not affiliated with, endorsed by, or connected to any previous owner, business or organisation that used this domain. Content published here belongs to the current website and does not represent any previous owner.

Choosing curtains for a small room

Curtains occupy more visual space than their name suggests. In a small room, they can soften hard edges and make a window feel more substantial, but they can also block useful daylight or crowd nearby furniture. I would start with the fitting and the amount of fabric before deciding on a pattern.

Measure around the window

Record the window size, the distance to adjacent walls and the location of radiators or furniture. Include the space needed for curtains to sit when open. A pole that extends beyond the window can help the fabric stack away from the glass, where the surrounding wall allows it.

That extension needs to be proportionate. A small wall section or an awkward corner may call for a different fitting or a blind instead.

Choose a practical drop

Long curtains can create a clean vertical line, but fabric pooling on the floor is not always convenient. Consider cleaning, pets and whether the curtains will be moved every day. Follow the maker’s measuring guidance for the heading type and fitting.

Keep curtains clear of heat sources according to the appliance’s safety guidance. A window directly above a radiator needs a considered arrangement rather than a default floor-length treatment.

Decide what the fabric needs to do

Privacy, glare control and light exclusion are different requirements. A sheer curtain may soften daylight while providing limited privacy after dark. A bedroom may need a more effective light-blocking treatment, including attention to gaps around the edges.

Look at a physical sample both against the wall and held up to daylight. The fabric’s appearance can change when light passes through it.

Keep the pattern in proportion

I would use a plain or subtle fabric where the room already has a patterned rug or busy bedding. A stronger curtain pattern can work when the other large surfaces are calmer. There is no need to make everything pale simply because the room is small.

The finished curtains should open easily and leave the room comfortable to use. If the rest of the space is still being planned, start with a calmer bedroom layout or these small living room notes.


Wild Design is an independently owned personal interiors blog. This website is not affiliated with, endorsed by, or connected to any previous owner, business or organisation that used this domain. Content published here belongs to the current website and does not represent any previous owner.

Layered living room lighting starts with what you do there

I prefer a living room with a few useful light sources over one very bright ceiling fitting. The room needs different things at different times: clear light for finding something, a comfortable lamp for reading and a softer atmosphere when the day is winding down.

That does not mean buying a lamp for every corner. Each light should solve a recognisable problem.

Map the places that need light

Start with the reading chair, sofa, desk or other places where you carry out a task. A lamp that looks balanced in a photograph may not put light where you need it. Sit in the chair and consider where a shade would be, whether the bulb would be visible and how you would reach the switch.

Then think about general movement through the room. You still need a comfortable way to enter, find things and move around.

Watch for glare and reflections

A bare bulb at eye level can be distracting even if it is not especially bright. Shades, diffusers and the direction of light all affect comfort. Check reflections in a television or shiny cabinet before settling on a position.

Some lamps send most light upwards, others downwards. Choose the shape for its job as well as its appearance.

Make the lights work together

Bulbs with similar colour temperatures tend to feel more coherent when used in the same area. Around 2700 K is a common starting point for a warm domestic atmosphere, though the best choice depends on your preference and the room.

Brightness is measured in lumens, so compare that figure when choosing bulbs. Always stay within the fitting’s specified bulb type and rating. Dimming also requires compatible lamps, bulbs and controls.

Plan the cables as well as the lamps

A floor lamp is not practical if its cable runs across a busy route. Use a safe position near a suitable socket and avoid creating trip hazards. Permanent wiring changes belong with a qualified electrician.

Before buying another fitting, try moving a lamp you already own. It can help you discover which part of the room feels uncomfortable after dark. Once the light is working, furniture and smaller details are much easier to judge.


Wild Design is an independently owned personal interiors blog. This website is not affiliated with, endorsed by, or connected to any previous owner, business or organisation that used this domain. Content published here belongs to the current website and does not represent any previous owner.

What I would consider before adding timber wall panelling

Timber wall panelling appeals to me because it introduces texture without necessarily adding another colour. But a panelled wall is a more involved decision than a new cushion or lamp. I would work through the layout and the room’s practical details before ordering acoustic panels.

Decide how much wall needs the treatment

A whole room can feel very different from one section behind a bed or desk. Consider how much timber is already present in the floor and furniture. A smaller area may provide the texture you want while leaving the rest of the room quieter.

Draw the proposed area to scale. Check whether the panel spacing and total width work with the furniture beneath it rather than assuming that a standard pack will finish neatly.

Work out the edges and interruptions

Outside corners, skirting, sockets and switches can make a simple wall more complicated. Look at the manufacturer’s trimming and finishing guidance before deciding on the final dimensions. A visible cut edge needs a deliberate solution.

Electrical fittings should remain accessible and suitable for the finished wall depth. Get a qualified electrician to handle changes to electrical fittings rather than improvising around them.

Check the wall and the product

Panelling is not a way to conceal an unresolved damp problem. The wall should be suitable for the installation method, and any moisture issue needs attention first. Follow the product’s guidance on fixings, adhesive, room conditions and maintenance.

Ask for a finish sample if available. Timber colour can vary, and photographs will not reliably show how it sits beside your flooring.

Separate appearance from performance

A slatted panel may be sold for its appearance, acoustic properties or both. Do not assume that all decorative panels perform alike. If sound absorption matters, look for the manufacturer’s test information and the installation arrangement that those results require.

Sound absorption within a room is also different from reducing noise transmission between rooms. Those are separate problems, and a decorative finish may not solve the latter.

My preference would be to choose the finish for a clear purpose and keep the surrounding styling simple. For help combining it with existing furniture, read my notes on mixing wood tones.


Wild Design is an independently owned personal interiors blog. This website is not affiliated with, endorsed by, or connected to any previous owner, business or organisation that used this domain. Content published here belongs to the current website and does not represent any previous owner.

Planning a painted feature wall without overwhelming the room

A feature wall can give a room a clear focal point, but I would not start by picking the strongest colour on a paint chart. First I would ask which wall deserves attention. Highlighting a wall with several doors, switches and awkward corners may emphasise exactly the details you hoped to ignore.

Choose the wall for a reason

A wall behind a bed or a well-positioned sofa can be a natural candidate. A fireplace wall might already have enough character without another strong treatment. Think about the view when you enter and the view from where you spend time sitting.

If every wall is equally interrupted, painting the whole room in a considered colour may feel more coherent than forcing a single focal point.

Test the colour at a useful scale

A small swatch does not show how a colour will feel across a full wall. Use a large sample board and move it beside the furniture, flooring and curtains. Look at it under your evening lighting as well as in daylight.

Pay attention to saturation as well as darkness. A muted deep colour and a bright mid-tone can have very different effects, even if both appear bold on the chart.

Plan where the colour ends

Decide how to treat corners, skirting and any recesses before starting. A clear stopping point usually looks more convincing than a line placed solely to avoid an awkward section. Include the edges you can see from adjoining rooms in that decision.

Follow the paint manufacturer’s preparation guidance for the surface. Clean, sound walls and suitable primer matter more than trying to cover everything with a thicker coat.

Keep the furniture arrangement in mind

Artwork, shelves and furniture will interrupt the painted area. Sketch their positions so the colour supports the composition rather than appearing in disconnected patches. I would leave some visible wall around the main piece of furniture.

For older or damaged surfaces, get suitable advice before sanding or disturbing existing coatings. A cosmetic update should not become an improvised repair job. If you are still weighing paint against another wall finish, see what I would consider before adding timber panelling.


Wild Design is an independently owned personal interiors blog. This website is not affiliated with, endorsed by, or connected to any previous owner, business or organisation that used this domain. Content published here belongs to the current website and does not represent any previous owner.

A narrow hallway needs less furniture and better decisions

A hallway has to deal with the untidy part of arriving home. Coats, shoes, bags and post all tend to stop there. In a narrow space, I would concentrate on that routine before choosing a console table or a decorative bench. A pretty entrance is not much use if you have to turn sideways to get through it.

Keep the busiest route clear

Check the entrance door swing and the route to the next room. Any proposed cabinet needs to work when the front door is fully open, not just when it is shut. Also allow access to meters, switches and anything else that needs occasional attention.

Mark the cabinet depth on the floor before ordering. A piece described as slim can still feel substantial in a tight passage.

Store the everyday items first

I would reserve hallway space for coats and shoes currently in use. Seasonal footwear and spare bags can live elsewhere if there is room. This keeps a small storage unit from being asked to hold an entire wardrobe.

A shoe cabinet’s capacity depends on the size and type of footwear. Check the internal arrangement; tall boots may need a different solution from trainers.

Use the wall thoughtfully

Hooks can be useful, but a row covered in bulky coats still projects into the hallway. Position them with that depth in mind. For wall-mounted storage, choose fixings appropriate to the wall construction and the loaded weight, and follow the manufacturer’s instructions.

A small shelf for keys can be enough where a console would take up too much space. I would keep its contents limited so it does not become another place for unanswered post.

Let decoration support the layout

A mirror may make the entrance feel brighter, but check what it reflects. A reflection of a cluttered coat rail will repeat the clutter. A washable runner can add softness where suitable, provided it lies securely and does not obstruct a door or create a trip edge.

The finishing test is simple: can you come in with shopping and close the door comfortably? If the answer is yes, the hallway is doing its main job. The same principle informs my small living room planning notes.


Wild Design is an independently owned personal interiors blog. This website is not affiliated with, endorsed by, or connected to any previous owner, business or organisation that used this domain. Content published here belongs to the current website and does not represent any previous owner.

Planning a small living room before buying furniture

In a small living room, the layout matters more than the number of clever storage ideas. I would rather have a comfortable sofa and a clear route through the room than squeeze in an extra chair that makes every movement awkward. The best first purchase may be nothing at all: start with a tape measure.

Draw the room as it is

Record the room dimensions, door swings, windows, radiators and sockets. Note anything that needs access, including cupboards and heating controls. It is easy to overlook these details when a furniture plan only shows the walls.

Then mark the route from the entrance to the other places you regularly reach. Those routes should inform the layout rather than become whatever space is left over.

Check the whole furniture footprint

A sofa’s width is only part of the decision. Depth, arms and a chaise section can take up more useful floor space than expected. Before ordering, mark its outline on the floor with masking tape, checking first that the tape is suitable for the finish.

Do the same for a coffee table. Walk around the outlines and sit where the sofa will be. Can you reach the table comfortably, and can someone pass without moving it?

Choose storage for actual belongings

List what needs to live in the room. Books, games, blankets and equipment all require different storage. A narrow cabinet may suit paperwork but be frustrating for bulky items. Closed storage is useful when the contents are visually busy; an open shelf works better for a smaller, edited collection.

I would check internal measurements, not just the overall dimensions, before buying.

Keep flexible pieces genuinely useful

A small side table can move more easily than a large central table. An occasional stool can provide a seat when needed, but it still needs somewhere sensible to stand the rest of the time. Flexible furniture loses its advantage if it constantly blocks a door.

Finally, test the plan against a normal evening rather than an empty room. Where do drinks, chargers and blankets go? For another common space problem, see my approach to a narrow hallway.


Wild Design is an independently owned personal interiors blog. This website is not affiliated with, endorsed by, or connected to any previous owner, business or organisation that used this domain. Content published here belongs to the current website and does not represent any previous owner.

Mixing wood tones without matching every piece

I do not think every wooden piece in a room needs the same finish. Matching everything can make the space feel a little rigid, while a considered mix gives you more freedom to keep furniture you like. The difficulty is knowing when variation feels intentional and when it feels accidental.

Let one finish lead

The floor often occupies the largest area, so it is a useful starting point. If that floor is pale oak, you might use a darker table as a contrast while keeping other large pieces quieter. Trying to give three strong finishes equal attention can make a small room feel busy.

Dominance is about visual area as well as the number of objects. One large cabinet may carry more weight than three small timber frames.

Look beyond the colour name

Two products described as oak can look very different. Stain, oil, lacquer and the grain itself all affect the finished appearance. Look at actual samples where possible rather than assuming that the species name guarantees a match.

I would compare the warmth of the finishes as well as their lightness. Honey-coloured timber and an orange-toned piece may feel different beside a grey-washed floor, even if all three are technically light woods.

Use a separating surface

If a table and floor look uncomfortably close in colour, a rug can create a useful break. Painted furniture, upholstery or a metal lamp can also stop the room becoming a continuous field of timber.

The separating material should earn its place. Choose a rug that suits the layout and how the room is used rather than adding one solely to hide an awkward combination.

Repeat a finish somewhere small

A dark cabinet can feel less isolated if its tone appears again in a picture frame or a chair detail. That repetition does not have to be exact. It simply helps the eye understand that the darker finish belongs in the room.

My final check would be the overall balance from the doorway. If the furniture works together at that distance, small differences in grain are unlikely to matter. For the wider palette, start with these notes on warm neutrals.


Wild Design is an independently owned personal interiors blog. This website is not affiliated with, endorsed by, or connected to any previous owner, business or organisation that used this domain. Content published here belongs to the current website and does not represent any previous owner.